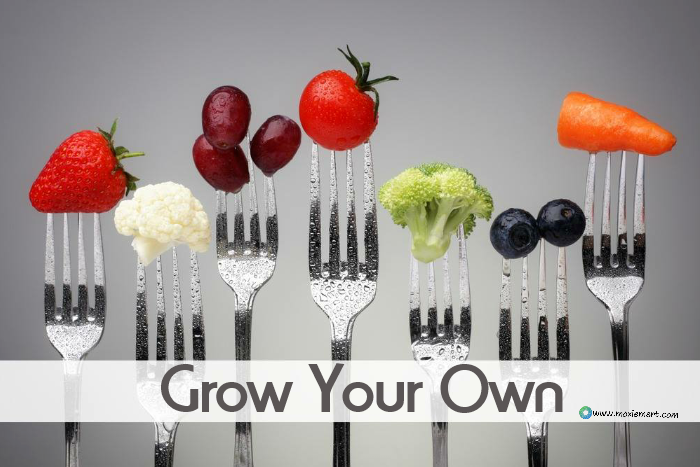
• Skip to primary navigation
  • Skip to main content
  • Skip to footer

Sustainable Life & Health

Be the most VIBRANT you!

SEARCH

  • Home
  • About Me
  • Blog
  • Helping Hand
  • Let’s Connect
  • Testimonials
You are here: Home / Archives for gardening

gardening

GARDEN TIPS

April 6, 2015 by Joni 4 Comments

Grow Veggies

Let’s grow veggies!

Warning! Growing your own organic veggies is heady stuff. Once you get your grown on, you won’t want to stop. How flippin’ fantastic is it to plant a tiny seed, nurture it through the stages of life and reap the rewards of a bountiful harvest? Well, let me put it this way – it’s kind of like parenting sans the sass and back talk! Quite fulfilling, plus you get sustenance. Bonus!

I was trying to figure out where to start with a gardening series for the blog  and BOOM! this graphic found its way to me. Thanks, Aldo! To get you growing quickly I’m sharing this glorious graphic with you in hopes that you get busy growing.

Graw Veggies
Grow Veggies

Source: Fix.com

The information should get anyone started. Be on the look out for detailed articles on specific subjects.

In the meantime check out:

How to fight white flies and aphids naturally.

Compost 101.

Why you should grow cruciferous veggies.


Filed Under: Gardening, Soil Tagged With: gardening, organic

10 Simple Gardening Tips

February 23, 2015 by Joni Leave a Comment

Who doesn’t like a great tip? Every growing season I learn something new to help our organic garden thrive. I came across this video and thought you would find these tips simple and effective!

Happy gardening!

Filed Under: Gardening Tagged With: gardening, organic, pests, seed starting

Compost: Waste Not, Want Not!

March 12, 2014 by Joni Leave a Comment

Every time I toss out a scrap of apple peel in the trash bin I have serious pangs of guilt. Grandma always said, “Waste not, want not!” Coming of age during the Depression was her teacher and I take her life lesson to heart. I’ve used all our compost in the bins prepping the beds for Spring and need to start anew. For some unexplained reason (possibly attributed to my potty training or whatnot…) there is a part of me that becomes paralyzed into inaction with the idea of doing ‘it’ wrong. Makes no matter what ‘it’ is either! Thankfully there is the other side of my personality that shouts “Just do it!”, and off we go! Time to get on with it…

Composting was one of the first projects we undertook on our road to sustainability. If you haven’t started, get busy! It is simple with a huge return on your investment. What is the investment? Time mostly. Here are the What?, When?, Where? and How? of composting.

What is composting? It is a mixture of decayed plants and other organic matter. In other words, instead of tossing apple peels in the trash bin, you toss them into a compost pile and let them become a rich and sexy soil enhancer!

When do I compost? Always. It is a perpetual kind of thing. Decomposition occurs naturally in nature. The trick for us is to help the process be more efficient. There are two types of composting; ‘cold’ and ‘hot’. Decomposing matter creates its own energy (ie: heat). When we harness the power of the microorganisms, temps in the center of a compost pile can reach 160 degrees Fahrenheit. To understand ‘cold’ composting, think of a forest. The dead wood and fallen leaves will decompose over time, but the temperature never gets that high. This is why it takes so long. For our purposes, we are after a ‘hot’ bed of decomposing goodness.

Where do I compost? There is a fact you need to understand about decomposition – it can get nasty. Balance is key. The correct mix of green and brown materials will keep the compost pile in harmony and ward off the nasty. In the event balance isn’t met, it is a good idea to place the compost pile in an inconspicuous area. Although, you do want it handy to access every day. There are two ways to do this; containers or open bins.

Our first go at composting was an open bin. There is a risk of critters and a lot of pitch forking going on in this system. It wasn’t long before I opted for a container. The first little beauty was the Envirocycle. It is a small tumbler composter. I like the ease of use in this little guy, but I soon realized we needed more composting space. We added a larger tumbler, which I love, but for the life of me cannot find the name of it! Plus, Jerry made one from a 55 gallon barrel (more on that later). Now, I use the smaller tumbler for the finished product. The compost can continue to mature, but is ready for use. Works for us. You’ll have to research ways to control the pile and see what works for you.

How do I start? The microorganisms are the workhorses of your compost and are similar to you and I. Really? Well, kind of… These good little guys need food, water and air – just like us. They do not need a perfect climate to exist, but will be more prevalent and work more efficiently if the environment is right (like some of us).

The air and water are pretty easy to handle – it’s the food that trips us up. Like us, the microorganisms thrive on a balanced diet. Their diet consists of ‘Greens’ and ‘Browns’. Greens are high in nitrogen and are the protein source for the little guys. Browns are high in carbon and provide their energy.

Here are some examples

GREENS (Nitrogen) : moist plant matter, coffee grounds, food waste, vegetable scraps, manures, seaweed, juicing pulp

BROWNS (Carbon) : leaves, pine needles, lint from dryer, shredded cardboard/newspaper, straw, sawdust, wood chips

Remember the bit about balance? Extremely important here. If you have too many Greens you will notice an odor that is far from pleasing. This means you need to up the Browns to find your balance again.

Here on the homestead, we know we are composting to create great garden soil, but we are also doing it to cut down on the amount of trash departing the curb each week. Look at everything you are about to toss out – is it either a plant or animal material? When you look at it – ask yourself if it is ‘Green’ or ‘Brown’.

To summarize:         Air + Water + Carbon + Nitrogen = Compost

§ Use equal amounts of “Greens” and “Browns.”

§ Mix together a variety of ingredients.

§ Shred or chop all ingredients, if possible.

§ Build the pile large enough to retain heat.

§ Turn or aerate the heap regularly to let in the air.

§ Keep the pile as moist as a damp sponge.

There is a ton of info on the web concerning composting and thousands of books published on the subject – just try not to get overwhelmed into inaction. It isn’t that difficult and if the nasty comes to call on your compost pile – it is easily overcome (trust me!). Just do it!

Happy composting…

~Joni

Filed Under: Gardening Tagged With: compost, gardening, organic

DIY Sticky Traps

February 20, 2014 by Joni 1 Comment

Maintaining an organic approach to gardening can be a maddening experience for gardeners. Us included. This is especially true when it comes to aphids and leaf miners. We found sticky traps do a fabulous job of keeping these marauders in check. Plus, sticky traps are a great early warning system because you can see the little buggers and get a heads up when they’ve decided to invade. We use them regularly!

There are two colors that the most notorious pests seem to gravitate toward – yellow and blue. Yellow is an attractant for Whiteflies, adult Fungus Gnats, winged Aphids and many other unwanted garden visitors. Blue is an attractant to Thrips and Leafminers and people report great success when used around roses.

The whole do-it-myself thing started nagging at me. I wanted to make my own instead of buying pack after pack of the little sticky  treasures. I found a paint-on sticky coating made by Tanglefoot and scooped it up. I had some old file folders in yellow and blue and decided they would be firm enough for greenhouse sticky traps. However, I would suggest using plastic plates or plastic file folders for outside jobs. The only thing lacking was a way to hold them up or stake them in the ground. Jerry is ingenious and of course had an immediate solution! Here is how we did it…

Materials

  • Tangle-Trap Brush On Sticky Trap Coating
  • Yellow or Blue paper or plastic squares
  • Galvanized Steel Wire (we had 19 gauge – lower the number higher the gauge)
  • Piece of ½” PVC pipe to help make the stakes
Steps

1. Cut your yellow and blue material into squares (size and shape is up to you).

2. Make stakes by cutting a section of wire and using the PVC tube to wrap a loop – three go-rounds should do it.

3. Paint a thin (1/16”) coat of Sticky Trap Coating over front and back of square. (It really is sticky – so be careful of your hands/surfaces!).

Careful! Very sticky.

4. Slide card into loop and place in the garden.

Ready for action!

It is recommended to place the traps about 3-7 feet apart within or just above plant foliage. When we need to hang sticky traps in the seedling greenhouse we use a binder clip and a bread tie to secure them.

Bottom line….these DIY sticky traps work and are much more economical for us! You can find Tangle-Trap Brush On Sticky Trap Coating for around $15 for an 8 ounce can and use any yellow or blue paper/plastic you find. I imagine we will get hundreds of sticky traps from this one can. When compared to approximately $1 a card for the pre-made sticky traps, I’d say this is the sustainable avenue.

Let us know if you give it a try.  We would love to hear from you!


Filed Under: Gardening Tagged With: aphids, DIY, featured, gardening, organic, pests, white flies

Before Footer

Digging Deeper…

Footer

  • Home
  • Privacy Policy
  • Disclaimer
  • Disclosure

Copyright © 2023 · Wellness Pro on Genesis Framework · WordPress · Log in